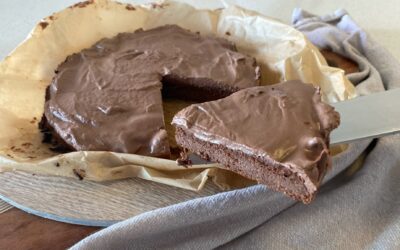
Dreamy Peanut butter and Strawberry Slice

by | Aug 21, 2023 | 0 comments

AuthorTessaCategoryDifficultyBeginner

This one is for our peanut butter and jam lovers! It's a perfect combination of textures and flavours.

Yields12 Servings
Prep Time20 minsCook Time15 minsTotal Time35 mins
Ingredients
Base
 1 cup shredded coconut
 1/2 cup almond meal
 1 tbsp coconut oil
Middle
 1/4 cup water
 1 cup frozen (and thawed) or fresh strawberries
Top
 1 cup smooth peanut butter
 3 tbsp maple syrup
 4 Strawberries sliced
Directions
Base
1

Line a loaf tin with baking paper. Set aside.

2

Combine all base ingredients in a food processor and blitz until fairly smooth.

3

Transfer the mixture into the loaf tin and press down with a spoon to spread evenly.

4

Place in the fridge to set.

Middle
5

Place the Gelatin in a small bowl or cup with the water, mix well and set aside to "bloom".

6

Blitz the strawberries in a food processor or Thermomix, but only for a few seconds to keep it slightly chunky.

7

Transfer the strawberry mixture into a pot and heat over a medium heat. Add the bloomed gelatin and stir until it has completely dissolved.

8

Transfer the strawberry and gelatin mixture into the loaf tin on top of the base and place back in the freezer to set.

Top
9

Heat a pot over a medium heat. Add the peanut butter and maple syrup, stir until smooth.

10

Pour the peanut mixture into the loaf tin on top of the strawberry layer and spread with a spoon.

11

Place sliced strawberries on the top of the peanut butter mixture. Return to the freezer to set.

12

**This slice is quite rich, so cut into small pieces (12+ pieces).

13

Store in the refrigerator.

Ingredients

Ingredients
Base
 1 cup shredded coconut
 1/2 cup almond meal
 1 tbsp coconut oil
Middle
 1/4 cup water
 1 cup frozen (and thawed) or fresh strawberries
Top
 1 cup smooth peanut butter
 3 tbsp maple syrup
 4 Strawberries sliced

Directions

Directions
Base
1

Line a loaf tin with baking paper. Set aside.

2

Combine all base ingredients in a food processor and blitz until fairly smooth.

3

Transfer the mixture into the loaf tin and press down with a spoon to spread evenly.

4

Place in the fridge to set.

Middle
5

Place the Gelatin in a small bowl or cup with the water, mix well and set aside to "bloom".

6

Blitz the strawberries in a food processor or Thermomix, but only for a few seconds to keep it slightly chunky.

7

Transfer the strawberry mixture into a pot and heat over a medium heat. Add the bloomed gelatin and stir until it has completely dissolved.

8

Transfer the strawberry and gelatin mixture into the loaf tin on top of the base and place back in the freezer to set.

Top
9

Heat a pot over a medium heat. Add the peanut butter and maple syrup, stir until smooth.

10

Pour the peanut mixture into the loaf tin on top of the strawberry layer and spread with a spoon.

11

Place sliced strawberries on the top of the peanut butter mixture. Return to the freezer to set.

12

**This slice is quite rich, so cut into small pieces (12+ pieces).

13

Store in the refrigerator.

Dreamy Peanut butter and Strawberry Slice
VIP Club featured

You May Also Like…

Chicken Quinoa Salad with a Creamy Tahini Dressing

Chicken Quinoa Salad with a Creamy Tahini Dressing

This well-balanced salad is packed full of flavour and goodness! Feel free to swap the chicken for Lamb, fish or beef – all of these options work great with this recipe. This salad lasts for up to 3 days in the fridge, which means it is great for lunches throughout the week.

Coconut Crunch Easter Treats

Coconut Crunch Easter Treats

A lot of store-bought Easter Eggs contain high amounts of refined sugars, artificial flavours & colourings and Emulsifiers to name just a few. But instead of missing out on Chocolate this Easter, why not whip up some home-made treats made from pure ingredients that taste just as decadent?

Homemade Nutella

Homemade Nutella

A healthy version of Nutella that the whole family will love. Great as cake icing, smothered on pancakes, blended with milk to create a delicious milkshake – or just by the spoonful!

0 Comments

Submit a Comment

Your email address will not be published. Required fields are marked *

My cart
Your cart is empty.

Looks like you haven't made a choice yet.